
Upon first joining the server, you are met with Godric. The nice fellow that will help you along the way of becoming independant in Bannerlord Online. A short dialog with reveal that in order to establish yourself, you will need to gain some troops. But before you can gain troops, you will need some money to recruit them and pay for their wages. Having just arrived, you do not have any money and no weapon or armor to protect yourself. You can always check your journal to see the progress of your missions or suggestions on what to do next.
Save up 500 denars
While the mission only requires you to save up 500 denars, it is strongly recommended to safe up a lot more so you can complete all the tutorial steps without having to go back to making money. Let's have a look at our starter options!
| Available Options | Short description | Guide |
|---|
| Arena | Defeat your enemies in the arena to win 500 Denars! | n/a |
| Chopping Wood | Travelling to Alsasos to chop down some wood. | Woodcutting |
| Wheat Farming | Farming wheat in Tarcutis. This doesn't pay all that well and can be ignored as a money making option. | Farming |
| Hunting Boars | Searching for boars and shooting them down with a bow in Zeocorys. | Hunting |
| Mining ore | Using a pickaxe to mine rocks in search for iron ore in Neocorys. | Mining |
The prices for the jobs as well as for the gear you'll need to buy are all player determined, so the amount you'll need may strongly vary per server and even per day. But I'd recommend sticking around until you have at least 20000 in your pockets. When you're on the campaign map, right click on any of the village names to see how much they're currently offering for the materials. This should help you choose which village to go to.
Remember, you have no weapons! So avoiding getting into a fight with the looters. But don't worry, bandits won't attack you in the Zeonica area when your party size is below 20, so you'll be able to reach all the nearby job villages safely.
Return to Godric
When you have sufficient denars, return to Godric. He can be found inside the tavern of Zeonica. You will be rewarded with 1500 Denars.

Now that we have some money, it's time to go shopping for some gear. The journal page will tell you what items you need and which tier it has to be. Leave the tavern (Hold TAB) and go to the Town Surroundings. It's time to visit the
Weaponsmith and
Armor Master. After buying the required items, make sure you equip them in your combat outfit and not in your civilian outfit. By default, the inventory will display the civilian outfit while you're inside a settlement.

Return to Godric in the tavern to move on to the next mission. You will receive some Bread as a reward.


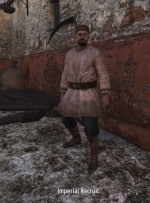
For your next step, you need to recruit at least 3 troops. The starter Imperial Recruit will be sufficient for this mission, but you're free to recruit any 3 troops that you'd like. In the Town Surroundings, you will be able to find tier 1 up to 3 troops standing around. The tavern can occasionally have tier 4 and 5 units available.
The Imperial recruit can be found in abundance inside the Zeonica streets. They all share a similar tunic. A simple way to spot them from a distance is by holding Alt, which will highlight all players and NPCs in your view, with the exception of the recruitable troops. So any person you see that has no name, you can recruit!
Your initial Party limit will be 5, including yourself. So you may as well recruit 4 Imperial Recruits or higher tier that you may spot inside Zeonica. Note that only 3 units will enter the the hideout in the next step, but Godric will also bring 2 units, so you should be fine.
Find Godric
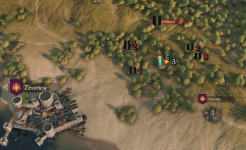
Godric will be waiting for you on the campaign map near a hideout. The location of the hideout can be in several locations, so you'll need to consule your Journal to see which direction you have to search. You may wish to reset the camera rotation to help determine which side is east and which side is west. Once you find it, talk to Godric who is just outside of the hideout.
East
Check within the vicinity of Tarcutis. In most cases you will be able to see the location while you're standing directly outside of Tarcutis. If not, walk in a big circle around Tarcutis, as your scouting is still low, you may not immediatly spot it even if you're close.
West
Search for the hideout between the coast line and Alsasos. This may also be a fairly big area, but shouldn't take long to find.
For my screenshot, the location of the hideout is listed as north-east of Zeonica.
 Return to Godric
After defeating the enemies inside the hideout, return to the tavern of Zeonica to talk to Godric. You will be rewarded with 2000 denars and have finished the tutorial missions. This will also unlock the interaction wheel which will allow you to
Barter and join/form
Groups.
Got injured?
If you got injured during the hideout, feel free to take a seat in the tavern while you're visiting Godric. Sitting on a chair rapidly increases the healing rate for your character. Outside of that, health will naturally restore itself over time.

Now that you've covered the tutorial, it's time for you to choose your own destiny. I hope this will have helped you through your tutorial steps and feel free to have a look at more New Player Tips!
New Player Tips A collection of useful tips & tricks for new players to help them on their journey. Character Culture How to make Money How to recruit troops How to increase party size What Troops to use How to make Food Attribute Points Inventory Capacity A horse Companions Player vs Player...

bannerlord-online.com
A collection of guides and FAQs Having written dozens of guides, it's about time to put them all together in a single thread. So here's my list of guides and FAQs! As my guides for errors already has a collective thread and is stickied in the bugs forum, I won't include those here. Frequently...

bannerlord-online.com


